

How To Create Enterprise Project Types
How To Create an Enterprise Project Type in Project Online
Project Online allows administrators to define containers called, 'Enterprise Project Types' that give your users options to use pre-defined assets for different scenarios in your company.
There are 3 assets contained within the EPT:
- Project schedule template
- Project site template
- Project Workflow
The project schedule template is a pre-built project schedule. Choosing a project template is required even if it is blank.
The project site template is a SharePoint subsite of your Project Web App. Defining a project site is optional but provides the project team with a place to manage issues, risks, deliverables, and documents. The template can be further built out to suit your needs.
Project workflows are optional and are designed using SharePoint Designer 2013. They are defined with stages and can include email notifications, and task approvals. Workflows can also help automate some of the information-gathering process required for the type of project. FYI - Power Automate workflows are not configurable here.
Why should you create a new project type?
If you're a small organization you may never need to create additional project types. If you work in a large company, multiple Enterprise Project Types can give departments more flexibility by providing different project schedule templates that are suited to specific scenarios.
For example, a pharmaceutical company may have the following EPTs:
- R&D
- Trial testing
- IT Projects
- HR Department
Clearly, each of these project types are very different from the other. An IT project would include tasks and activities that would not be executed like a Trial testing project. EPTs may have project sites with customized options and include sets of specific documents. Workflows may require different phases and stages and include a completely different set of approvers.
Step-by-step
- Open Project Online as an administrator. Click on the gear icon located in the top-right of your browser.
- In the Settings panel, click on the PWA Settings hyperlink.
- On the PWA Settings page, in the Workflow and Project Detail section, click on Enterprise Project Types.

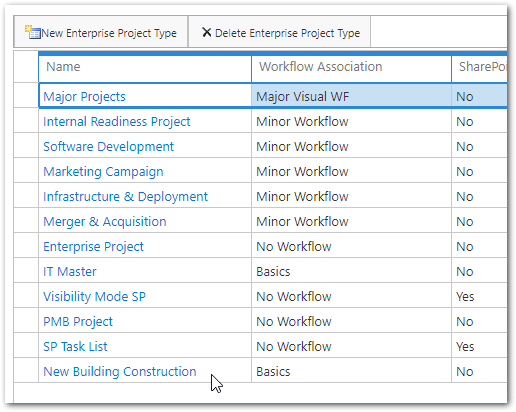
- The Enterprise Project Types page displays a table with a list of EPTs. Click the New Enterprise Project Type button.

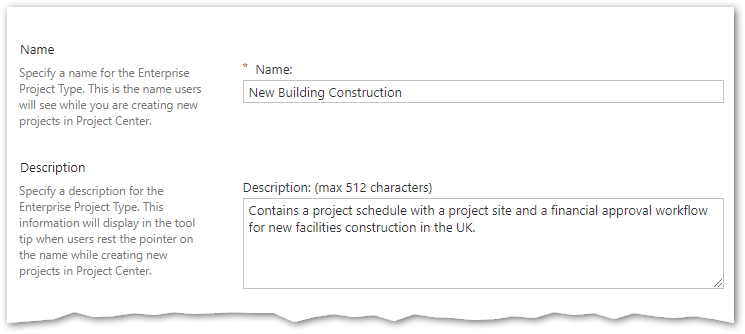
- Name the EPT with a concise but descriptive name so users who create new projects will understand its function.
As an option, enter a description in the textbox. The description will appear as a tooltip when users select a new project type.
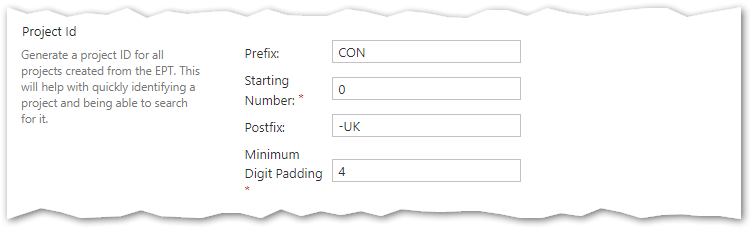
- Configure automatic numbering for Project Id.
In the following example, the first Project Id that will be generated is CON0000-UK.
The next projects created will be CON0001-UK, CON0002-UK, and so on.
- Click the checkbox if you want to manage activities for your project in a SharePoint Tasks List. If your projects tend to be larger than 50 tasks, consider unchecking the option for better performance.
If you've designed a workflow in SharePoint designer 2013 as a SharePoint 2013 Workflow - Project Server workflow and published it, it will appear here in the Site Workflow Association dropdown.
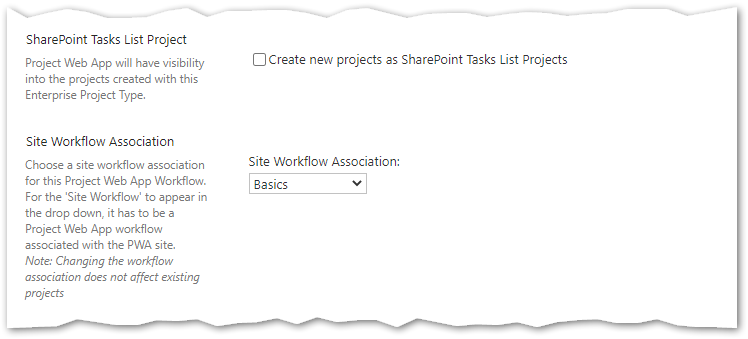
The label is somewhat confusing. It's called a Site Workflow because all workflows of this type are Site workflows (as opposed to List or Reusable workflows).
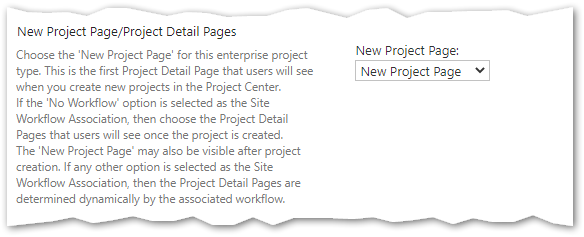
- Select the New Project Page. This can be a customized page presented to users when they create a new project.
- Click the check box if this is the default Project Type.
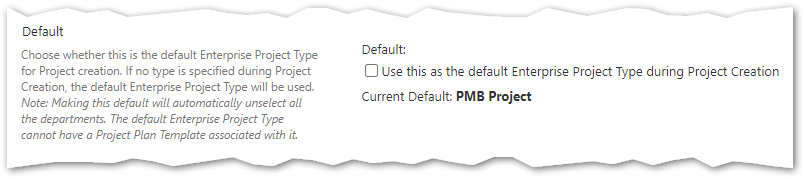
If you create a new project from the Project Professional desktop app, you cannot pick the EPT. In this situation, it is the default Enterprise Project Type that's used.
Also, if you select this option, you cannot select a Project Plan template in the dropdown at the bottom of the page. This is by design. It prevents schedules from being overwritten due to conflicts when a user creates a new project using the desktop application.
- Select the department the EPT should be assigned to. This will hide project types in the Project Center's New Project button in the ribbon. This is an optional feature and not commonly configured.
Add an image that will quickly help to identify the EPT visually. As a best practice, it's recommended to use the 'Site Asset' library in the root of PWA and not 'Shared Documents'.

- Set the Order where this new EPT will appear in your list of project types. Consider putting frequently used ones at the top or ordering them alphabetically.

- Choose when to create a project site. Selecting 'Automatically create a site on next publish' will create a site on the next publish in Project Professional desktop app.
Creating a new project by selecting an EPT is different. If you create a project using this method, a project site will be provisioned when you click the Finish button at the bottom of the New Project – Project Detail Page (referenced in step #8).
Configure the site location URL. It is strongly recommended to keep your project sites under the root of PWA. Changing the location will have unexpected consequences with security and broken functionality. Seriously, don't do it.

- Click Sync User Permissions to automatically manage the project site's User Permissions. If you add resources to your project schedule using the Build Team tool, then publish the schedule, any user added to the team will be automatically granted permission to the project site.
Turn off this feature if site permissions will be managed manually.
Sync SharePoint Tasks Lists takes tasks from your project schedule and synchronizes them with a SharePoint list on the project site. If you have more than 50 tasks in your project schedule, consider turning this feature off for better performance.

- Set the language for the project site.
Select the Site Template. Project Site Templates can be customized and saved as solutions in SharePoint.
Once a template has been defined, it will appear as an option in the drop-down.

- Choose a Project Schedule Template.
Schedules can be customized with tasks, resources, costs, etc. suited for different scenarios.
Creating the schedule template and saving it will make it available in the drop-down.

- Click Save. It should now appear in the Enterprise Project Type table in the order you selected.
- Finally, try creating a project using the new project type. Verify it looks as you expected.
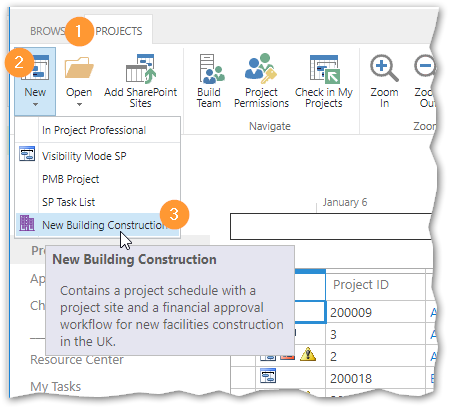
- Navigate to the Project Center
- Click the Projects Tab
- Click the New button
- Place your cursor over the new EPT to see the description in the tooltip.
It's a good idea to test your EPT thoroughly by opening and reviewing the project schedule, checking the project site for issues, and testing the workflow. Depending on the complexity, this could take a few minutes to several days. It's worth the time to put real-world data into the validation so the project team isn't burdened with mistakes.
What happens when you change settings in an existing Enterprise Project Type?
Changes will not affect anything previously created.
When a new project is created from an EPT, it's spawned as a copy of the templates and stands autonomously. If you make a change to the EPT, projects created prior to the change are unaffected. Only newly provisioned projects will be affected. The same applies to changing the schedule template, the project site template, and the workflow.